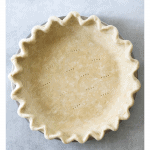
How to Make Perfect Flakey Pie Crust
Flakey, tender, buttery pie crust is easier to make than you might think! This fool-proof recipe will teach you how to make pie crust both in a food processor and by hand!

Once you learn to master the art of making pie crust from scratch you will never want to go back to store-bought! I’m going to let you in on a little secret: it’s not that hard! I have outlined two different methods below for making pie crust. You can either use a food processor or making it by hand.
The benefit of using the food processor is it’s super quick and yields a very consistent pie crust. It’s also my preferred method during the holidays because it’s great for baking 2-3 batches at one time.
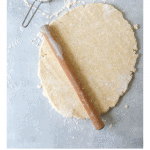
If you like to get a little more hands-on with your baking you can very easily make pie dough by hand. When making pie crust by hand I like to freeze and then grate the butter on a box grater for more even butter distribution.
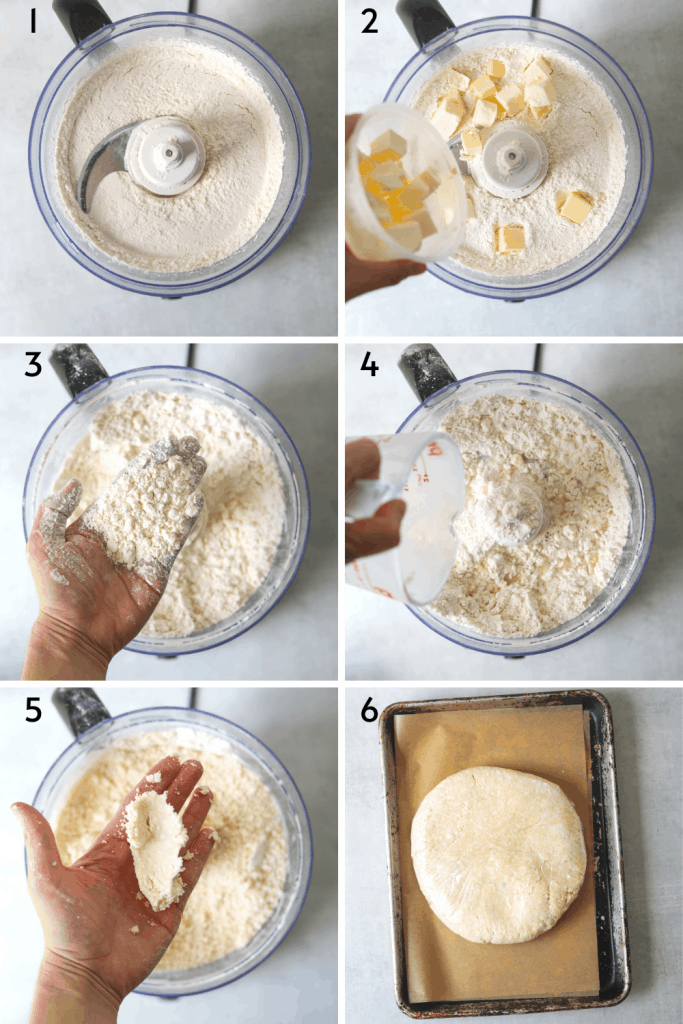
How to Make Pie Crust in a Food Processor:
- Pulse the dry ingredients together.
- Add in the cold cubed butter then pulse 3-4 times until the mixture resembles coarse wet sand.
- Next, pour in the ice-cold water/vinegar mixture. Pulse 5-10 more times until the dough holds together when you press it in the palm of your hand.
- Turn the mixture out onto a work surface and use your hands to form a disk. Wrap the dough disk tightly in the plastic wrap and refrigerate for at least 2 hours to allow the dough to hydrate and rest.
Watch this video to learn how to make flakey pie crust by hand:
Recipe Tips + Tricks:
Pre-Chill your ingredients, especially if it’s warm in your kitchen! Throwing the ingredients (and even your mixing bowl or food processor blade) in the freezer for 10-15 minutes is one extra step to ensure your butter stays cold throughout the dough-making process.
It’s all about the butter! For the best flavor, I use high-quality European butter. European butter has a higher fat content and less water than regular butter. Using a higher fat butter results in a tender, flakey pie crust.
Work Quickly! In order to keep the butter and other ingredients cool you will want to make the dough as quickly as possible and get it back in the refrigerator to chill and rest.
FAQS
Pie dough can be made 3 days ahead. Keep chilled, or transfer to a resealable plastic bag and freeze for up to 3 months. Thaw overnight in the refrigerator before rolling out.
Vinegar helps prevent the formation of gluten which makes for a tough crust. You won’t notice the flavor after the crust is baked, I promise!
You cannot skip this step! Chilling the dough is important because it gives the butter time to re-solidify and for the dough to hydrate. If you’ve ever had a pie crust become greasy or shrink it likely could have been prevented by an extra hour of refrigeration.
Almost any! This is the recipe I use for all of my Thanksgiving pies like apple, pecan, and pumpkin. You can also use this recipe for savory pies, crostatas, galettes, hand pies, etc.
Check out more great recipes

How to Make Perfect Pie Crust
Ingredients
- 2 1/2 c all-purpose flour
- 1 tbsp sugar
- 1 tsp kosher salt
- 1 c very cold butter
- 1/2 c ice-cold water + 1 tbsp apple cider vinegar
Instructions
Food Processor Method:
- Place the dry ingredients into the base of the food processor and pulse 3-4 times until combined. Next, add the cold butter and continue pulsing until the mixture resembles coarse, wet sand.
- Next, add in the water/vinegar mixture and pulse 5-10 more times until the dough holds together when you press it together in the palm of your hand. Do not overprocess.
- Turn the mixture out onto a work surface and use your hands to form a disk. Wrap the dough disk tightly in the plastic wrap and refrigerate for at least 2 hours to allow the dough to hydrate and rest. After two hours of resting your dough is ready to use.
By Hand:
- Put the butter in the freezer for ten minutes before starting. In the meantime place all of the dry ingredients into a large mixing bowl.
- Use a box grater to grate the frozen butter into the bowl with the dry ingredients. Then, use your fingers to rub the butter into the flour. Work quickly to keep the butter from melting. The mixture should resemble coarse, wet sand with some visible flecks of butter.
- Next, pour the ice-water/vinegar over the flour mixture. Mix the dough together with your hands just until starts to hold together. It will still look a little dry, but resist the urge to keep kneading.
- Turn the mixture out onto a work surface and use your hands to form a disk. Wrap the dough disk tightly in plastic wrap and refrigerate for at least 2 hours to allow the dough to hydrate and rest. After two hours of resting your dough is ready to use.
Notes
It’s all about the butter! For the best flavor, I use high-quality European butter. European butter has a higher fat content and less water than regular butter. Using a higher fat butter results in a tender, flakey pie crust.
Work Quickly! In order to keep the butter and other ingredients cool you will want to make the dough as quickly as possible and get it back in the refrigerator to chill and rest.